

This blog explains how to use Phalcon Fork to play the Ethernaut CTF 2024.
Preface
Currently, the deployment of Capture The Flag (CTF) competitions within the Web3 domain predominantly relies on containerized infrastructure. Among the various solutions employed, solidctf and paradigm-ctf-infrastructure are well-known and have garnered widespread recognition within the community. The latter offers distinct advantages in its robust support for Foundry, which enables the automated deployment of multi-contract challenges using foundry script, significantly optimizing deployment efficiency.
For players, the current setup of challenge environments allows for local debugging using tools such as Foundry. However, due to the lack of support from transaction explorer, inspecting the specifics of on-chain transactions remains reliant on command-line interactions. This process can be limiting and even painful, particularly with complex transactions.
Phalcon Fork is a specialized tool designed for Web3 developers and security researchers. By connecting to Fork via an RPC endpoint, users can use the Phalcon Explorer to browse transactions and, more crucially, debug them. Besides, Fork boasts an internal block browser named Phalcon Scan, akin to Etherscan, facilitating easier viewing of transactions and accounts within the Fork.
In this blog, we will explore how Phalcon Fork enhances the problem-solving experience for CTFers. All of the selected challenges are from the Ethernaut CTF 2024.
Thanks to OpenZeppelin for providing these high-quality challenges. All attachments used in this blog have been uploaded to our GitHub repo.
Space Bank
Upon auditing the Challenge contract, we can identify that the ultimate objective of this challenge is to invoke the explodeSpaceBank function and set the exploded flag to true. This task requires bypassing a sequence of verifications.
After deploying the challenge using the provided deploy.sh script, the deployed contracts can be viewed on the relative Fork:

By analyzing the source code of the SpaceBank contract, it's evident that we need to invoke the flashLoan function and re-enter the deposit function to trigger the increment of EmergencyAlarms and navigate through the checks within the _emergencyAlarmProtocol function. Additionally, this re-entrancy bug can also achieve the objective of draining all SpaceToken from the contract.
function deposit(uint256 amount, bytes calldata data) external _emergencyAlarms(data) {
    require(token.transferFrom(msg.sender, address(this), amount), "Transfer failed");
    balances[msg.sender] += amount;
}

function flashLoan(uint256 amount, address flashLoanReceiver) external {
    uint256 initialBalance = token.balanceOf(address(this));

    require(initialBalance >= amount, "Not enough liquidity");
    // Transfer loan amount to the receiver
    require(token.transfer(flashLoanReceiver, amount), "Transfer failed");

    // Execute custom logic in the receiver's contract
    entered = true;

    (bool success, bytes memory result) =
        flashLoanReceiver.call(abi.encodeWithSignature("executeFlashLoan(uint256)", amount)); // -> Here we can re-enter deposit function
    if (success == false) revert(string(result));
    entered = false;
    uint256 fee = amount / 1000; // 0.1% fee
    uint256 currentBalance = token.balanceOf(address(this));
    require(currentBalance >= initialBalance + fee, "Loan not repaid with fee");
}
The tricky part lies in lines 97 to 101. Here, when EmergencyAlarms reaches 2, the contract uses CREATE2 to create a new contract. After verifying an increase in balance, it assigns the new contract's address to the storage variable _createdAddress. Then, at line 117, the code checks if the code length at that address is 0. Fortunately, we can bypass these checks by leveraging SELFDESTRUCT.
For a detailed solution to this challenge, please refer to the official write-up provided.
Wombo Combo
The prototype of this challenge is the TIME Token attack that occurred in December 2023, we can review one of the initial attack transactions here. The vulnerability stemmed from an incompatibility issue between ERC-2771 and Multicall in their implementation. We can get an in-depth explanation of this issue on OpenZeppelin's official blog.
Let's talk back to the challenge itself, it's noted that OpenZeppelin fixed this issue in versions 5.0.1 and 4.9.4 by identifying the context within the multicall function. Given that the Muticall contract utilized in this challenge is v4.4.1, we can construct the following call sequence:
- Forwarder.execute(multicall(bytes[])) -> Staking.multicall(bytes[]) -> delegatecall(maliciousCalldata) -> Execute as Victim
Specifically, Victim is parsed from the last 20 bytes of maliciousCalldata using the _msgSender() function.
After deploying the challenge, the historical transactions of the Staking contract can be viewed on Fork Scan:
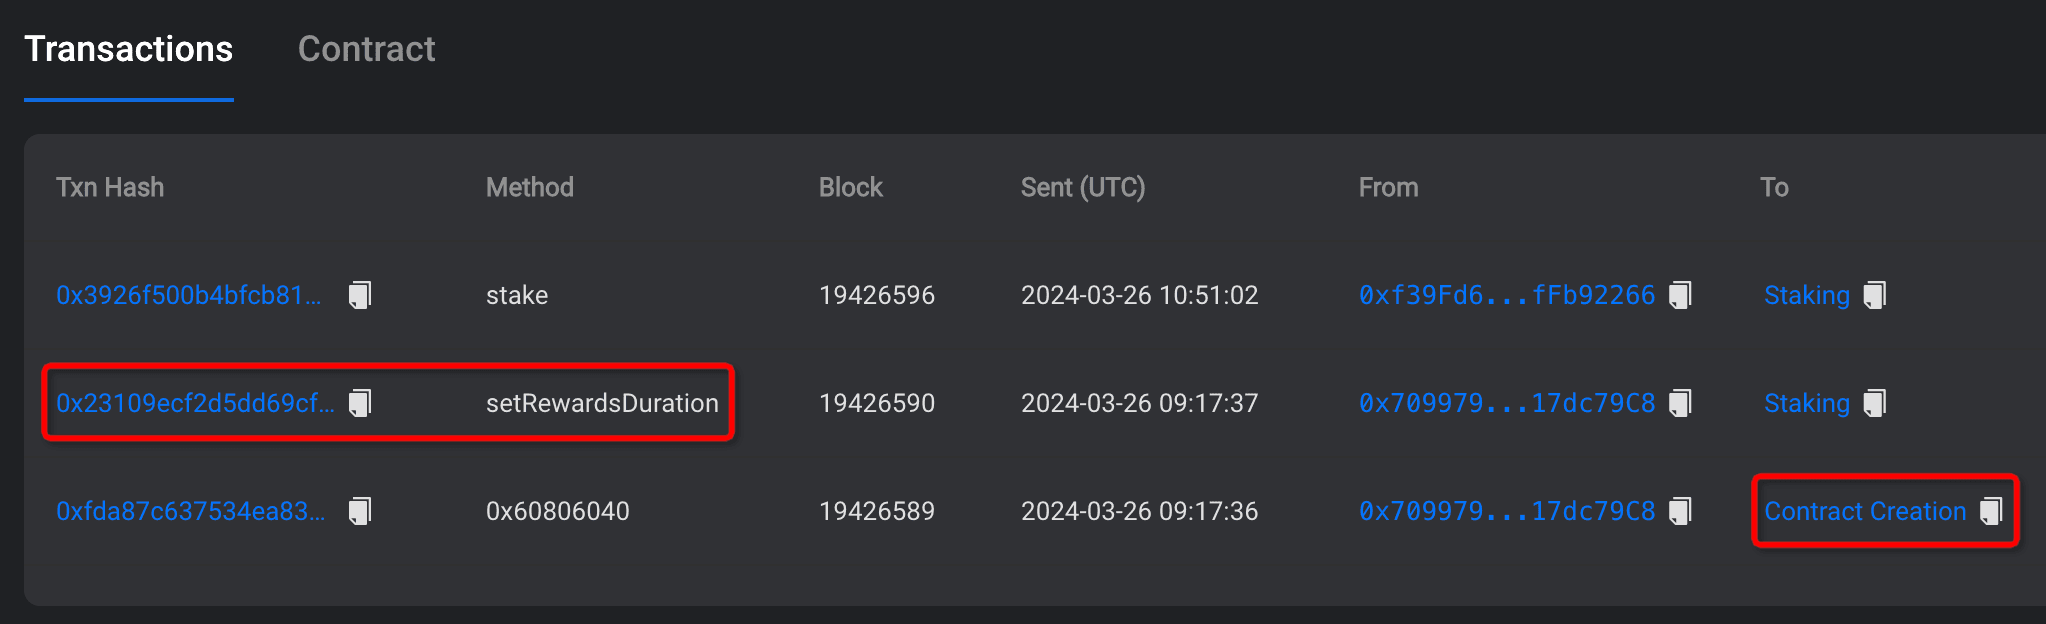
Through analysis of the transaction history, we can find that the reward duration, denoted as duration, is set to 20. While the reward rate is left uninitialized. Utilizing the call sequence mentioned earlier, we can employ the code below to generate maliciousCalldata, effectively bypassing the onlyOwner() check:
bytes[] memory maliciousCalldata = new bytes[](2);
maliciousCalldata[0] = abi.encodeWithSignature(
    "setRewardsDuration(uint256)",
    uint256(1), // minimal duration
    owner
);
maliciousCalldata[1] = abi.encodeWithSignature(
    "notifyRewardAmount(uint256)",
    uint256(1128120030438127299645800), // amazing number
    owner
);
After successfully modifying both the duration and rewardRate, proceeding with regular staking enables one to claim a substantial amount of reward tokens. Transferring these tokens to the address 0x123 and we can get the flag.
XYZ
This is a more complex DeFi-related challenge, which takes inspiration from the Raft.fi protocol attack occurred in November 2023. You can view our report on this incident here.
In a nutshell, the attacker exploited the liquidation logic and manipulated the storedIndex of the collateral token through a donation. Combining the precision loss issue in the mint function, the attacker was facilitated to mint 1 share of collateral token with only 1 amount of underlying token. By repeating this process, one can drain the protocol.
This challenge is a simplified version of the original incident and comes with a preset unhealthy position that can be liquidated. To solve this challenge, the XYZ token balance of the address 0xcafebabe must equal $250,000,000 * 1e18$. This indicates that we need to further amplify the signal of the collateral token XYZ-sETH-c, enabling the borrowing of a larger amount of XYZ tokens with just 1 share of XYZ-sETH-c.
function mint(address to, uint256 amount) external onlyManager {
    _mint(to, amount.divUp(signal));
}

function setSignal(uint256 backingAmount) external onlyManager {
    uint256 supply = ERC20.totalSupply();
    uint256 newSignal = (backingAmount == 0 && supply == 0) ? ProtocolMath.ONE : backingAmount.divUp(supply);
    signal = newSignal;
}
Diving into the Manager contract, we notice that it requires us to invoke liquidate function to trigger the setSignal logic within the ERC20Signal contract. In order to pump up the value of signal, we can control the backingAmount through a donation (i.e. directly transfer sETH to Manager).
After deploying our test attack contract and sending the transaction in the Fork, we can access the transaction details via the blockchain explorer. Furthermore, the following command can be employed to verify our Exp contract to facilitate easier debugging:
forge verify-contract <address> <path>:<contract> --etherscan-api-key <phalcon access key> --verifier-url "https://api.phalcon.xyz/api/<phalcon rpc id>" --rpc-url <phalcon rpc url>
Upon debugging the transaction in the explorer, it is clear that the setSignal function of XYZ-sETH-c has been successfully executed as intended.
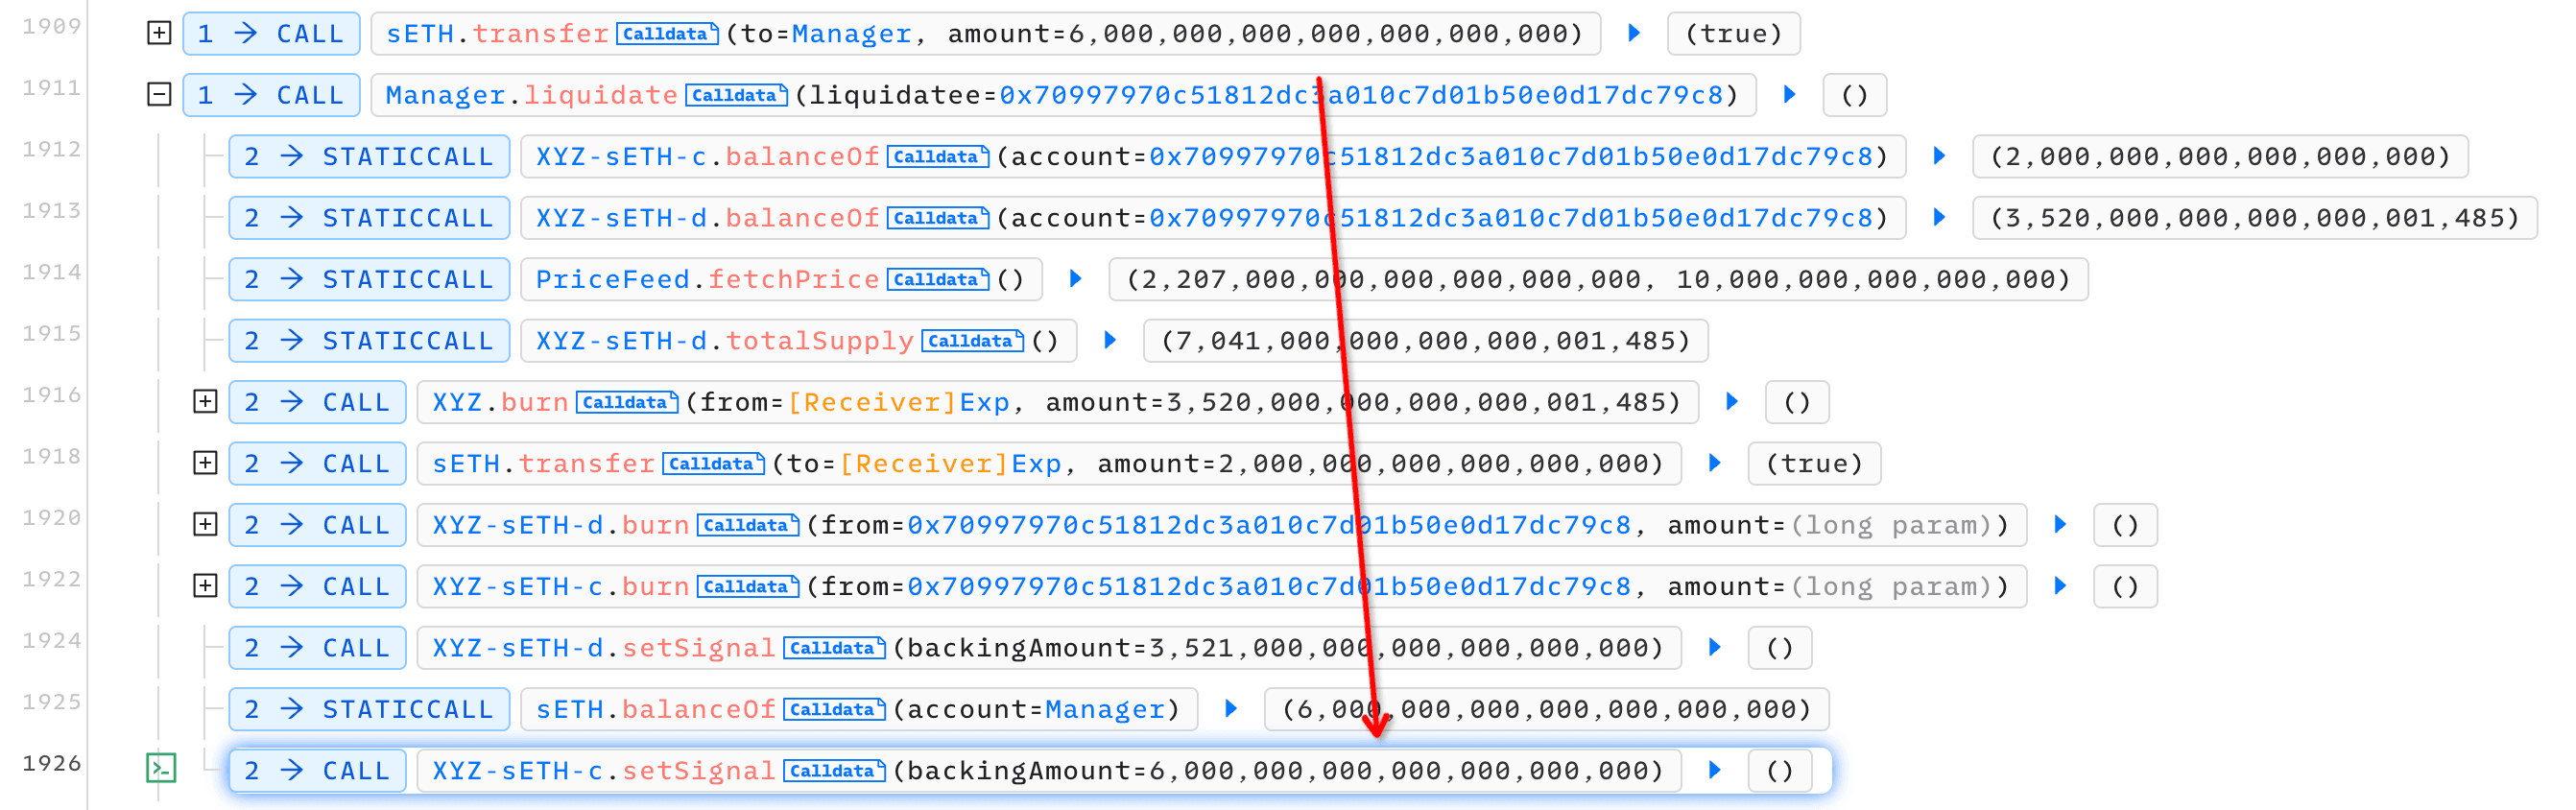
Since we have verified the source code of all contracts, we are also enabled to step in the Exp contract and meticulously track the debug trace. This allows us to ensure that each operation is performed exactly as anticipated.
You can browse and debug all transactions associated with the test attack contract here.
Conclusion
By leveraging Phalcon Fork to create a private testnet and deploy CTF challenges, players can utilize the integrated blockchain and transaction explorers to aid in capturing the flag. The created Fork, accessible through RPC, is compatible with development and testing frameworks, allowing players to enjoy their CTF game in a more real-world and modernized environment.


